
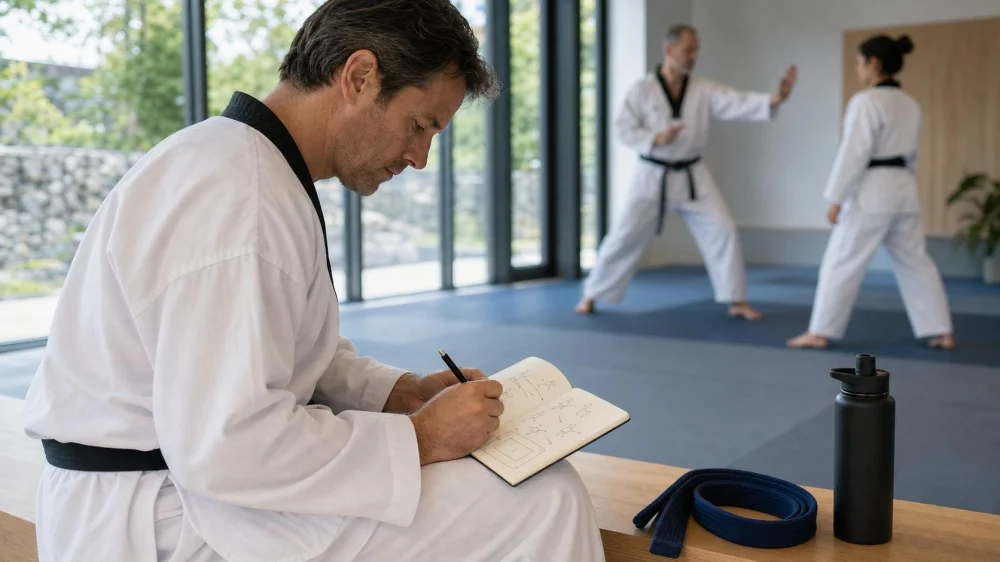
Build a Tae Kwon Do Training Notebook That Helps
On this page
- Quick answer
- Give the notebook one purpose
- Use a short class template
- Record technique without inventing instruction
- Capture coach feedback accurately
- Map forms and combinations
- Track sparring decisions, not wins
- Note effort, recovery, and pain
- Protect privacy and school material
- Run a weekly review
- Avoid common notebook mistakes
- One-page notebook checklist
- Frequently asked questions
- Next steps
Quick answer
After each Tae Kwon Do class, spend three to five minutes recording the date, class focus, one cue that helped, one mistake to revisit, one question for the instructor, and the next small practice target. Keep the entry short enough that you will use it consistently.
A training notebook supports memory; it does not replace instruction. Write the technique names and terminology used by your school, separate the instructor’s words from your interpretation, and confirm uncertainty in the next class. Do not secretly record classmates, copy private curriculum, or publish another student’s feedback.
Wolf MMA / wolf hills jiu jitsu
Falls ChurchFairfax CountyVirginia
7799 Leesburg Pike suite 110, Falls Church, VA 22043, USA
Give the notebook one purpose
Decide what the notebook should improve. A beginner may need class recall and terminology. A student preparing for a belt test may need curriculum coverage. A competitor may need tactical patterns, while an instructor trainee may need lesson observations.
Write one sentence inside the front cover: “This notebook helps me remember one useful action for the next class.” That keeps pages from becoming a diary of vague reactions or a catalog of every drill.
Choose paper or a digital note based on where you can write safely. A small paper notebook avoids phones on the training floor. A digital system can be searchable but should stay out of locker rooms and respect the school’s device policy.

Kim's Hapkido Martial Arts / kim's hapkido
PasadenaLos Angeles CountyCalifornia
3324 E Colorado Blvd, Pasadena, CA 91107, USA
Use a short class template
Repeat the same headings for every entry:
- Date and class: location, level, and instructor.
- Main focus: forms, basics, kicking, sparring, self-defense, conditioning, or testing.
- One cue: a brief phrase that improved the movement.
- One problem: a specific moment, not “I was bad.”
- One question: what needs confirmation.
- Next action: a measurable practice target.
- Effort and symptoms: simple notes for recovery and safety.
Use checkboxes for actions. “Ask about rear-foot position before Tuesday’s drill” is easier to complete than “improve stance.” Leave room for the instructor’s answer.
Record technique without inventing instruction
Technique is difficult to capture in text. Avoid writing a complete how-to from memory immediately after learning a movement. Instead, record the start position, target named by the instructor, key safety limit, and the cue that changed your result.
Label statements:
- Coach cue: words you are confident the instructor used.
- My observation: what you felt or noticed.
- Question: an uncertain detail to verify.
This distinction prevents an imperfect memory from becoming a personal rule. Terminology, chamber positions, stance dimensions, breathing, and application can differ among organizations and schools. Use the curriculum taught where you train.
A small stick figure or arrow can show direction, but never rely on a sketch for joint alignment, contact, falling, breaking, weapons, or partner techniques. Those require supervised instruction.
Capture coach feedback accurately
Write feedback as soon as practical, then translate it into an observable action. If the coach says “control the finish,” your next action might be “hold the final position for one calm count during light practice.” Ask whether that interpretation is correct.
Limit the entry to one or two priorities. Trying to fix eight details simultaneously often hides which change worked. When feedback seems inconsistent, note the drill and context. A cue for speed practice may differ from one used in a slow technical repetition.
Do not compare the amount of feedback you receive with another student. Instructors may adjust teaching by experience, age, safety, or the day’s goal. Record what you can act on.
Map forms and combinations
For poomsae or school forms, draw a simple floor path only if your instructor permits it. Mark sections with neutral labels such as opening, first turn, middle sequence, and finish. Use the official or school-approved movement names.
Circle the transition where direction, stance, or timing breaks down. Practice that transition only with permission and adequate space, then reconnect it to the movement before and after. Do not repeat the full form when one two-step link is the problem.
For combinations, record the order, stance or lead side, target level named in class, and partner or pad context. Include a control note. A combination practiced on a pad is not permission to use it on an unsupervised person.
Use version dates. When the instructor corrects your notes, strike through the old detail once and write the correction beside it rather than erasing the learning history.
Track sparring decisions, not wins
After supervised sparring, write patterns rather than a score. Note distance, timing, boundary awareness, defense, control, and communication. Useful observations include “backed straight toward the edge,” “looked down after first kick,” or “rushed when partner changed stance.”
Record one successful decision and one safer alternative. Do not diagnose a partner, mock their habits, or write private medical information. Use initials only if your school permits partner notes, and keep the notebook private.
A notebook is not a place to plan retaliation or unsupervised testing. Ask the coach how to drill a tactical idea with protective equipment, agreed intensity, and a suitable partner.
Note effort, recovery, and pain
A simple session effort score can reveal patterns. Use a consistent scale, such as easy, moderate, hard, and very hard. Add sleep quality and whether unusual soreness affected movement. The score is personal; it is not a contest.
Separate normal exertion from symptoms. Record the location, timing, and activity associated with pain, dizziness, headache, numbness, breathing difficulty, or a joint giving way. Stop training and tell the instructor when a symptom raises concern.
The notebook cannot diagnose an injury. Sudden severe pain, suspected concussion, inability to bear weight, chest pain, fainting, major swelling, or neurological symptoms need appropriate medical evaluation. Do not use the log to justify training through a warning sign.
Protect privacy and school material
Ask before taking photographs or video. Some schools prohibit devices on the floor, restrict recordings of curriculum, or require consent from every visible participant. Never use a camera in a locker room or changing area.
The U.S. Center for SafeSport recommends a device-free locker-room culture because camera devices can compromise athlete privacy. Youth programs may also follow Minor Athlete Abuse Prevention Policies and organizational rules governing electronic communication and one-on-one interactions.
Do not post belt-test notes, private feedback, attendance, contact details, injuries, or images of minors without authorization. A personal notebook can name your own experience without exposing someone else.
Run a weekly review
Once per week, scan the entries and make three lists:
- Confirmed: cues the instructor verified.
- Open: questions to ask in class.
- Next: one technique, one fitness habit, and one etiquette action.
Look for repetition. If the same question appears for three weeks, ask it directly rather than collecting more uncertain notes. If the same symptom follows one drill, tell the instructor and seek healthcare guidance when appropriate.
At the end of a training cycle, summarize what improved and which practice method helped. Progress can include better control, recall, attendance, communication, or recovery, not only a belt result.
Avoid common notebook mistakes
- Writing everything: choose the few details that change the next session.
- Copying terminology from random videos: confirm the school’s language.
- Turning notes into self-criticism: describe an action, not your worth.
- Recording only successes: questions and safe mistakes are useful data.
- Using video without consent: follow privacy and device rules.
- Practicing risky material alone: mark it “supervision required.”
- Ignoring the notebook: review before class and close one open question.
One-page notebook checklist
- Date, class, and main focus
- One confirmed coach cue
- One personal observation
- One question to verify
- One small next action
- Effort and unusual symptoms
- Privacy-safe wording
- Weekly review date
Frequently asked questions
Should I write during class?
Only when the instructor allows it and you are outside the active training area. A short note immediately after class is usually less disruptive.
Can I film a form instead?
Only with school permission and the consent required for everyone visible. Never film in a changing area. Written cues may be safer and easier to review.
How long should an entry be?
Five to eight short lines can be enough. Consistency and review matter more than length.
Should parents keep the notebook for a child?
A parent can help with dates and questions, but the student should describe their own experience. Follow the instructor’s communication and youth-safety policies.
Next steps
Set up one page with the seven headings in this guide. After your next class, fill it in for five minutes and bring one question to the instructor.
Review the page before the following session. If the notebook does not change what you ask, practice, or remember, remove fields until it becomes useful.
 Taekwon-Do Mixed Martial Arts Fitness Academy5.0 (10 reviews)
 Balmer Martial Arts5.0 (10 reviews)
 Giordano's ATA Martial Arts SCV5.0 (5 reviews)
 Z-Ultimate Self Defense Studios5.0 (8 reviews)
 Kisu's Karate LLC5.0 (14 reviews)
 Traditional Okinawan Karate5.0 (45 reviews)
 How to Execute a Jumping Roundhouse Kick to the Head
 How to Execute a Double Kick Combination in Sparring
 How to Perform a Flawless Axe Kick: A Step-by-Step Guide
 DIY Tae Kwon Do Training Equipment for Home Practice
 How to Increase Your Vertical Jump for Tae Kwon Do Flying Kicks
 The History of the Tae Kwon Do Peace Corps