
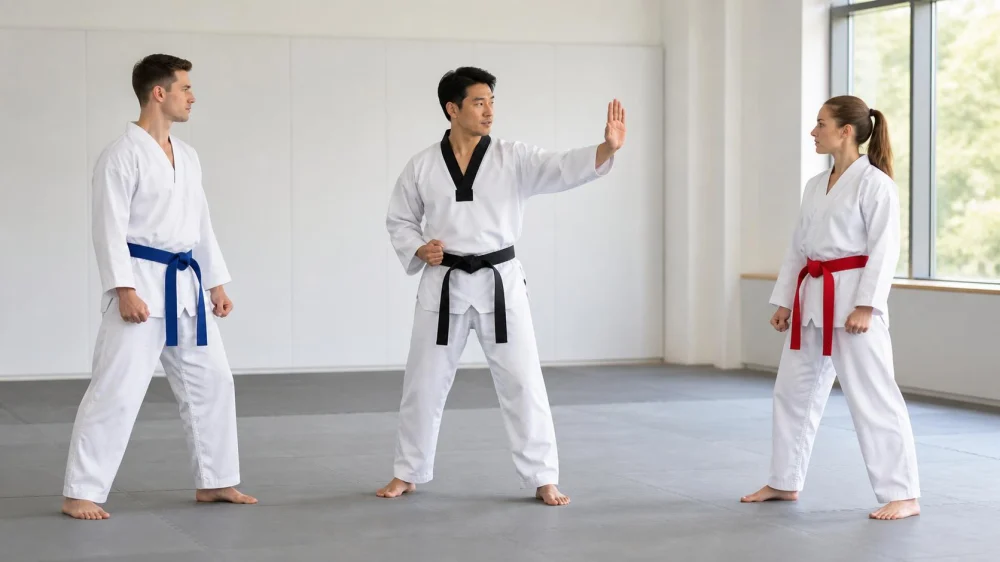
Tae Kwon Do Partner Drills: Set Speed, Target, and Stop
On this page
Quick answer
Before a partner drill begins, listen to the instructor, identify the exact technique and target, agree on contact level and pace, and choose a clear stop signal. Check space and required protective gear, start slower than the final goal, and reset after every loss of distance or control. Either partner can stop immediately for pain, confusion, fatigue, or unsafe movement.
Budo Martial Arts Studio / budo martial arts studio
Ewing TownshipMercer CountyNew Jersey
9 Scotch Rd, Ewing Township, NJ 08628, USA
Why partner agreement matters before movement
The same drill name can be performed as non-contact timing, light controlled touch, target-pad work, or a more dynamic exchange. Height, reach, experience, mobility, protective gear, fatigue, and communication affect safe distance and reaction time. A partner should not have to infer speed or contact after the first technique is already moving.
This guide is for Tae Kwon Do students in United States classes following qualified instructor supervision. It does not replace school rules, coaching, medical clearance, safeguarding, or competition regulations. Contact level, age grouping, rank, technique permissions, and protective equipment vary by organization and class.

Champions Martial Arts Plainview / champions martial arts plainview
PlainviewNassau CountyNew York
10 Washington Ave, Plainview, NY 11803, USA
Practical checklist
- Instructor's drill name, learning goal, allowed techniques, sequence, target area, repetitions, direction, and reset point.
- Whether the drill is no-contact, touch-contact, pad-contact, or another explicitly defined level and what that means in the school.
- Starting distance, stance, lead side, speed, rhythm, feeder and responder roles, and when roles switch.
- Required mouthguard, head, chest, forearm, shin, hand, foot, groin, or other protective gear and its correct fit.
- Clear verbal stop word plus a visible signal, instructor call, boundaries, and what both partners do immediately after a stop.
- Mat traction, gaps, nearby pairs, walls, bags, mirrors, equipment, spectators, and a safe direction for movement.
- Injury, illness, dizziness, pain, fatigue, sensory needs, prior limitations, and any modification already agreed with the instructor.
Step-by-step plan
- Watch the full instructor demonstration and ask what the target, contact, speed, scoring, and reset should look like before pairing.
- Introduce yourself if needed, compare reach and experience briefly, and state any instructor-approved limitation without pressure to disclose private details.
- Check required gear and the shared area. Move only objects the instructor permits and ask for space or a different pairing when necessary.
- Rehearse the stop word and signal once while stationary, then confirm that either partner may use it without debate.
- Begin at a slow pace with exaggerated control and clear resets. Increase speed only when both partners and the instructor agree the drill remains accurate.
- Pause after a miss, unexpected contact, distance collapse, gear shift, distraction, or change in pain or balance; return to the starting position before restarting.
- At the end, check for symptoms or equipment damage, thank the partner, and tell the instructor about contact, confusion, or a modification needed next time.
In a private training log, note the drill goal, technique, target, contact level, partner role, pace, protective gear, instructor cue, distance problem, stop or reset reason, symptoms, and the one change planned for the next session. Avoid recording another student's health details without permission.
Limits and important notes
Agreement does not make a prohibited technique or unsafe contact acceptable. Do not increase contact because one partner is senior, larger, preparing for competition, or reluctant to speak. A stop signal does not replace instructor oversight, proper grouping, protective equipment, mat control, or emergency procedures.
Stop immediately for head or neck contact outside the drill, loss of consciousness, confusion, severe pain, breathing difficulty, weakness, numbness, major bleeding, suspected fracture, eye injury, or inability to bear weight. Follow the school's emergency plan and seek appropriate medical evaluation. Report coercion, repeated ignored stops, or safeguarding concerns to responsible staff.
Frequently asked questions
Who chooses the contact level?
The instructor and school rules define permitted contact, and partners should confirm the specific drill level before starting.
Can a lower-rank student stop a drill?
Yes. Either partner should stop for pain, confusion, unsafe distance, gear problems, fatigue, or any loss of control.
What if partners have very different reach?
Ask the instructor to adjust starting distance, roles, targets, pace, technique, or pairing rather than improvising at speed.
Should speed increase every round?
Only if accuracy, balance, distance, communication, and control remain consistent and the instructor permits progression.
What happens after an accidental hit?
Stop, assess the person, notify the instructor, follow the school's injury procedure, and do not resume until appropriately cleared.
Sources and evidence
Use the school's current curriculum, safeguarding and emergency plan, instructor demonstration, equipment manufacturer instructions, and the governing Tae Kwon Do organization's rules for the specific class or event. Generic partner-drill advice cannot override technique, contact, age, rank, or medical restrictions.
Conclusion and next steps
Define the drill before moving: technique, target, roles, distance, contact, speed, gear, stop signal, and reset. Start slowly, preserve control, and pause whenever the shared understanding changes. Consistent partner communication makes technical feedback clearer and gives both students permission to protect safety without turning the drill into an argument.

 Aikido of San Jose4.0 (7 reviews)
 Nikko Jujitsu School4.0 (9 reviews)
 Gracie Barra San Clemente Martial Arts4.0 (47 reviews)
 Karate Institute of America4.0 (4 reviews)
 Keweenaw Korean Martial Arts0.0 (0 reviews)
 Wing Chun School of Internal Arts5.0 (6 reviews)
 How to Execute a Jumping Roundhouse Kick to the Head
 How to Execute a Double Kick Combination in Sparring
 How to Perform a Flawless Axe Kick: A Step-by-Step Guide
 DIY Tae Kwon Do Training Equipment for Home Practice
 How to Increase Your Vertical Jump for Tae Kwon Do Flying Kicks
 The History of the Tae Kwon Do Peace Corps