
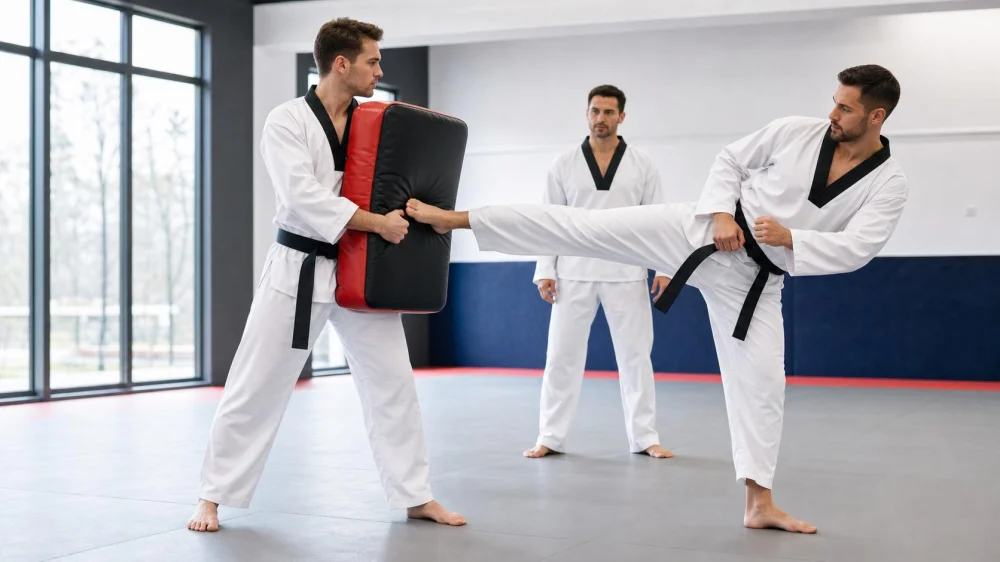
Tae Kwon Do Kick Pad Drills: Set Height, Distance, and Holder Safety First
Quick answer: Follow the instructor's drill exactly. Inspect the pad, clear the mat, agree on kick and intensity, set a reachable target height, test distance slowly, and give the holder a stable stance with protected joints. Start with light technical repetitions and stop immediately if the holder is off balance, the kicker loses control, or either partner feels pain.
1. Inspect Straps, Handles, Padding, and Seams
Do not use a pad with torn handles, loose straps, exposed hard parts, compressed padding, or a wet slippery cover. Show damage to the instructor and choose approved equipment. Remove jewelry and secure nails and clothing as school rules require.
Budo Martial Arts Studio / budo martial arts studio
Ewing TownshipMercer CountyNew Jersey
9 Scotch Rd, Ewing Township, NJ 08628, USA
2. Clear the Kicking Lane and Landing Area
Confirm there is room behind the holder and around the kicker. Move bags, bottles, spare pads, and other groups away. Work on a clean, dry, flat mat and follow the class direction of travel.
Champions Martial Arts Plainview / champions martial arts plainview
PlainviewNassau CountyNew York
10 Washington Ave, Plainview, NY 11803, USA
3. Name the Kick, Side, Count, and Intensity
Before starting, both partners should know the exact technique, target, number of repetitions, pace, and whether the instructor wants touch, speed, or power. Demonstrate slowly when terminology is unclear. Never surprise a holder with a different kick.
4. Set Height for Control, Not Ego
Begin at a height the kicker can reach without leaning, jumping unexpectedly, or losing the supporting-foot position. Target height should match the drill, experience, mobility, and instructor's direction. Lowering the target is good training when it preserves form.
5. Measure Range With a Slow Test Repetition
Use a chamber or light touch to check distance. The kicker should contact the intended center without jamming the joint or reaching with the toes. The holder should not step into the kick after it starts.
6. Hold With Stable Feet and Protected Joints
Use the stance and pad position taught by the instructor. Keep wrists, elbows, shoulders, head, and torso aligned for that pad type. Do not lock joints, wrap straps incorrectly, or brace against an unstable wall. The holder must be able to see the kicker.
7. Build From Technical Contact to Approved Power
Start light and increase only after several controlled repetitions. A loud sound is not proof of good technique. Stop escalating when the holder moves excessively, the pad folds, distance changes, or control declines.
8. Use “Ready,” a Count, and an Immediate Stop Word
The holder confirms readiness before every series. Either partner can call stop for pain, poor grip, lost balance, equipment movement, distraction, or uncertainty. Stop means no more kicks until both partners and the instructor reset the drill.
9. Pause Before Switching Sides or Roles
Lower the pad, step out of range, and exchange it without swinging straps or blocking the training lane. Reset target height and distance for the new kicker; bodies and preferred sides differ.
10. Report Pain and Clean Equipment as Directed
End the drill if pain, numbness, dizziness, or joint instability appears and tell the instructor. Wipe and return pads according to school procedure, then report new tears or loose parts so the next group does not inherit a hidden hazard.

 Aikido of San Jose4.0 (7 reviews)
 Nikko Jujitsu School4.0 (9 reviews)
 Gracie Barra San Clemente Martial Arts4.0 (47 reviews)
 Karate Institute of America4.0 (4 reviews)
 Keweenaw Korean Martial Arts0.0 (0 reviews)
 Wing Chun School of Internal Arts5.0 (6 reviews)
 How to Execute a Jumping Roundhouse Kick to the Head
 How to Execute a Double Kick Combination in Sparring
 How to Perform a Flawless Axe Kick: A Step-by-Step Guide
 DIY Tae Kwon Do Training Equipment for Home Practice
 How to Increase Your Vertical Jump for Tae Kwon Do Flying Kicks
 The History of the Tae Kwon Do Peace Corps